Posts

Showing posts with the label frames

Last phase of major construction about to start

Image
Despite a week of distraction (see my other boat ) I got a few minor jobs done and finally ordered the last two ply sheets for the deck and the carbon for the deck and foils. I may actually have enough carbon for the gantry setup too and ordered a 1" pipe to connect the transom together and hang the gantry from. The minor jobs included mounting the chainplates and cutting away some of the extra bulkhead so that there is a chance to access the back of the chainplates through the inspection hatch. I also wimped out and added a small amount of support for the mainsheet block in the form of two cedar doublers on the girder. This is because I may go with a four screw block and the screws would be near the edge of the girder. The plan for the weekend is to cut out the rest of the card templates for the deck, and to start the centreboard. I now have an approximate plan on how to get the shape right but some trepidation too! Will need to get my hands on some vacuum bag...

Side decks on, and I messed up two weeks ago

Image
Put the side decks on today. It was reasonably straightforward. After a few hours I cleared the clamps, planed the excess off the tops and stood back to admire this next piece of progress. Wait. Was the front kinda lopsided? Sadly yes. And digging out an angle measurer I was soon confirming the bad news. The bottom of the port side bulkhead was offset 1/4" relative to the starboard. Arrrrggggghhhhh.... Left side is more upright than the right, just at the front. I spent some time wondering if I could live with it and decided no to. More measuring confirmed that it was fine at bulkhead 3. The problem was just that my custom bulkheads hadn't been as similar to each other as I thought. So I made a wedge to fill it. With some tiny spacers added in the corner to get the padding up to the needed amount. Funny thing is I still can't tell if this is straight. But that's a step forward from utter certainty that it was wrong. Good ...

Chine Steaming Failure

Image
John came round to try some of this boat building nonsense and together we approached the chines. Having steamed each piece for about an hour and a half we clamped them in place and I left them for a couple of days. If you look closely you'll see I cut the port side one a bit short - will be able to fill the gap with a little shim when I'm done. One thing to note was we needed to bevel the blocks on frames #1, #2 and #3 to get the chines to sit tight. Otherwise you have this gap: Sadly when I finally came to unclamp / untie them though they just sprung out with hardly any shape remembered. So now I'm in recovery mode. Second steaming attempt, this time I'm bagging one side at a time, filling the bag with steam and doing this for an hour more even after the pieces are clamped in place (still in the bag). Fingers crossed tomorrow I'll declamp and find the shape is a bit closer to that desired. Certainly the wood was kept pretty hot and ...

Girder glued in place, met my self imposed deadline

Image
I wanted to be onto the stringers by today and I sort of am. Glued the girder in place yesterday. Lots of glue and clamping. Came out okay. Today I managed to do some cleanup - a fair few major dribbles involved but the joins were pretty well filled and the boat seems fairly straight. When I was sanding my transom down I took the centre a bit too far. In an effort to make it smoothly curved I missed the fact that the centre stands a little proud of the general curve. Now that the girder is glued in place I'm building this back up again. Hopefully gravity will pull this gooey mess just flat enough but not flatter than it needs to be and the final sand will be easy. So what about those stringers?  Well, I borrowed Jeff's of the other Farr (currently nearly complete on his girder but distracted by his big boat) planar. And planed my cedar down to the 3/4" thickness needed for the stringers. So they are started :) Amazing machine that s...

Mounting the Frames Part III

Image
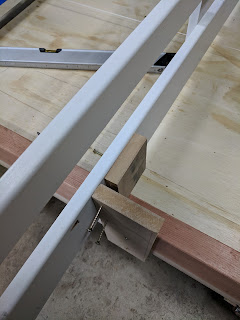
Exciting day today. I continued fixing up the inconsistencies in the frames and fairly quickly got to a stage where I trusted a dry fit of the girder. Along the way I needed to adjust a couple of frames a couple of mm to the side, this being tricky with the block pattern I had I came up with a fairly neat solution that allowed side to side adjustment. This photo shows the screws used to adjust the offset, on the other side I added spacers behind the vertical. This was added to three frames and it was time for a dry fit. About 30 seconds in I hit my next snag. The plans called for a half in space on the #4 frame which I'd assumed allowed for the CB doubler. It's possible that actually the CB doubler was meant to stop prior to the bolt (and only bolt through the ply skins). Even with hindsight it was a bit tricky to tell. Anyway, cutting the frame doublers back a bit extra allowed them to clear the bolts.  Blimey it suddenly looks a bit like a boat! St...

Mounting the Frames Part II

Image
Got all the frames mounted on the building box. In my mind I'd been expecting a few hours (meaning a couple of days) of adjustment to get them straight but blargh I have to admit some disappointment at how far out my supports were. As I was having difficulty eyeballing which frames were out I added a second string down the centreline. This makes things clear as day. Frame #1 is a joke, Frame #4 which should have been setup when I was getting the hang of things is significantly off centre too (and actually its off vertically too now I come to remeasure it). Despite it getting late I remounted #1. Didn't take long to get a much better attempt. Frame #4 will get remounted tomorrow. And then I'll continue adjusting the others to get everything straight enough for a dry fit of the girder. Won't be sniffing a stringer until the weekend for sure!!! Take away thoughts: Second string on centre line is awesome Needed to do a better job with the initial layo...

Frames moving to the build box

Image
Putting the frames onto their supports was a little fiddly as expected. A mockup girder helped set the centre line and I learnt to clamp blocks to the workbench at the expected locations to help set them up reliably. Once one side was set I simply then copied the measurements from the side with the plan to the other side. Frame #5 proved the trickiest. I suspect that my frame deviates from the plan by about 1mm. In the end I made the bottom accurate and think the top will come good when the stringers are attached as they end up being the ply skin bearing surfaces. And with this finished last night this morning I got to attach frame #1 to the base and started on #2. Going to take a few hours to be satisfied that all is straight but with the string down the centre and a straight box this is just a nudge here and a nudge there and possible a shim here and a shim there until satisfied. In my "learning to work with MDF" today's lesson is predrill your screws even i...

Mounting The Frames

Image
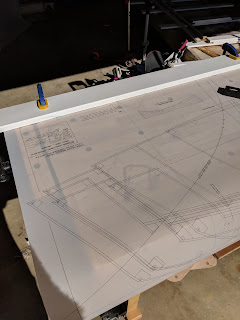
The frames get mounted onto the build box (also known as a strong box) temporarily screwed onto a set of mdf (or other dimensionally stable material) forms. I'd never used power tools on mdf before. What a mess. It just dissolves into a fine dust. Worth taking some precautions. My expectation is to spend most of this week going through this process. At the end of it the boat will be in its final shape for the first time just in skeleton form and the long process of filling in the gaps will begin. Getting the frames setup exactly to measurement is critical, and I'll admit to being a bit scared, though worst case when double triple quadruple checking I'll find the mistake and just have to unscrew things and do it again. The plans come with a plastic template that shows offsets from the baseline that the build box provides. I set this up with a straight edge along the baseline to work from. Prior to this step I'd worked out the approximate lengths of all the m...

Setting Up The Frames

Image
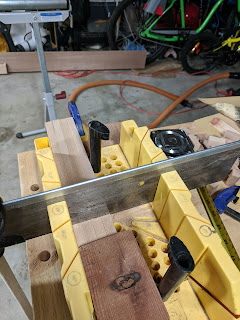
With the grider done it was time to move onto the frames. First step was 46 inchish long pieces to back the stringers, along with some longer pieces for the chines. Being lazy I went with four cuts at a time to speed things up. Worked a charm. The tops of the frames are a bit more complicated. I decided to laminate the #2 beam under the fordeck from a combination of Cedar (light) and Spruce (strong). Partly this was because I had the offcuts available and partly because I wanted to try some lamination. For the cockpit deck supports I just steamed Cedar. To get the curve I attached blocks to a sheet of ply, built a steamer from some 3" ABS pipe (5' for this part but with another 8' I can attach later for the stringers and chines) and a wall paper steamer. Once steamed I clamped the wood to the template and left it for a while. My initial results steaming weren't that great so I insulated the setup, added a thermometer and added some cross beams to lift th...

Album