Posts

Showing posts with the label fairing

Rudder Pt II (III and IV to come I guess)

Image
" Hopefully can finish up fairing tomorrow" I said, four days ago! Turn out that the I beam mod took a lot more sanding and reshaping to get back to a good shape, probably about four hours total with three layers of epoxy filler in there. But finally it's ready to skin again.... That join isn't great but hey most of these are cored in foam the strength will be in the three layers of carbon cloth the top part of the foil is going to end up with.

Side decks on, and I messed up two weeks ago

Image
Put the side decks on today. It was reasonably straightforward. After a few hours I cleared the clamps, planed the excess off the tops and stood back to admire this next piece of progress. Wait. Was the front kinda lopsided? Sadly yes. And digging out an angle measurer I was soon confirming the bad news. The bottom of the port side bulkhead was offset 1/4" relative to the starboard. Arrrrggggghhhhh.... Left side is more upright than the right, just at the front. I spent some time wondering if I could live with it and decided no to. More measuring confirmed that it was fine at bulkhead 3. The problem was just that my custom bulkheads hadn't been as similar to each other as I thought. So I made a wedge to fill it. With some tiny spacers added in the corner to get the padding up to the needed amount. Funny thing is I still can't tell if this is straight. But that's a step forward from utter certainty that it was wrong. Good ...

Back on track, almost ready to turn the boat over........

Image
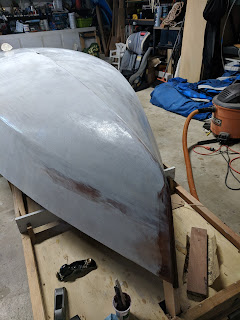
.... just wondering how much pre paint prep I should do now, for instance fully sand the bottom while it's firmly attached to the base? Anyway, finished scrapping the muck off from my c**k up and sanded and got back to reapplying. Took a moment to shape the stem and glue it on. I did this after the glass as I see it as a sacrificial element and want it to be easy to grind off. Having said that it's made of a pretty solid piece of teak. Rolling and tipping makes a moderately smooth epoxy finish but it's not perfect. Going to require a fair amount of sanding to be ready to paint.

Waste three days

Image
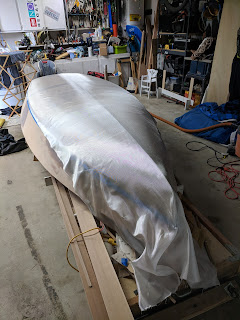
I was rushing..... I've been sealing the bottom. A layer of 4oz cloth laid over the hull for two days, then squeegeed, then filler coats with pigment in them to make it visible where I'd rolled them on. It was going swimmingly or so I thought. I had a race to get to on my big boat, and winches to rebuild before we hit the water so as I say I was rushing as I laid down the final filler coat. And on the last batch (I've been working in 4 pump squeeze batches, seems a nice working size) I suddenly realized the viscosity felt different, lighter.  And the pot wasn't warning.... Ooops. No hardener. And I had to rush off leaving it like that. In hindsight this was silly, I should have scrapped off as much as possible but I figured if it didn't set it would still be easy to remove later. WRONG. Some of it actually went quite hard, but I could still mark it with my nail 24 hours later. So I scrapped it off. Two hours of scrapping. Probably some more tom...

Fairing (first pass)

Image
FarrOut is going to get its hull fair in two stages. The first before applying glass cloth to get the basic shape smooth and the second prior to painting. Fairing is done with West System 407 light filler. If you don't normally wear a mask I'd highly suggest donning one for this stage as the material is very light and tends to puff out off the mixing bowl especially as the additive is a fine dust. I learnt a few tricks during this process. Firstly wet the ply with a wet (neat) epoxy coat before applying the thick mixture as it won't penetrate  the wood very well on it's own, but will chemically bond to the neat mixture you laid as a base. Secondly down strips of the fairing compound first. You can do this pretty roughly as they are easy to sand. Let them cure for a few hours and sand them down (see next tip) Notice that weird board sitting on the boat? That's my next tip! Make yourself a torture board. Mine is probably a little short the pros even b...

ITS A BOAT. (well, it's starting to look like one)

Image
Since I last posted things have been going at a whirl. I've promised I'll make a table this weekend so will have to slow down but I just ran out of epoxy anyway.... Anyway. Getting the bottom skin on was a scary step but it's been super fun. I've made mistakes sure but seem to have come out the other end in good shape. I'm pretty happy with the joins, everything seems pretty true and fairing seems likely pretty straightforward with just two main spots I've seen needing building up. Clamping the second bottom sheet Look at me with no clamps! Card template for the side Trial fit. Darth Vadar in the house! Gluing the first side panel And the second!

Album