Posts

Showing posts with the label rudder

Rudder Pt II (III and IV to come I guess)

Image
" Hopefully can finish up fairing tomorrow" I said, four days ago! Turn out that the I beam mod took a lot more sanding and reshaping to get back to a good shape, probably about four hours total with three layers of epoxy filler in there. But finally it's ready to skin again.... That join isn't great but hey most of these are cored in foam the strength will be in the three layers of carbon cloth the top part of the foil is going to end up with.

Repairing the rudder

Image
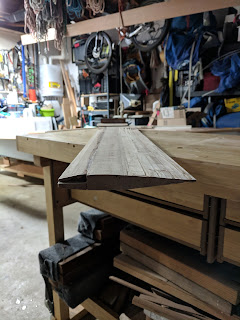
Having decided to repair the rudder step one was to get the main stock rebonded. To do this I embedded two pieces of spruce. Rather than sand down the prior paint I decided to just pull off the carbon skin. This pulled the top layer of the spruce too leaving it pitted and rough so I filled the whole top. With it looking like a rudder again I sawed it into two pieces.... This is in order to work towards the final aim of both restoring the shape and also making the foil a LOT stronger than it was before. Aims are: Remove that big hole. It was way too big! Instead bond the down-haul into a smaller hole. Turn the foil into an I beam with carbon cross sections Thicken up with carbon skin from plan 1 Cutting the foil in half was a prep step towards step 2. To finish up I added two layers of carbon with an ash strip (about 1/8" thick) to replace the wood removed in the cut. Hopefully can finish up fairing tomorrow and get the foil skinned...

Last thing on the list... break it

Image
I had a scrappy piece of paper with my final "get it on the water" checklist and Vida added her own item.... I'd always joked with the kids that Farrout would get broken and repaired many times, partly just to get them used to the idea that this was fine (like capsizing, or falling off your bike). Anyway.... To work off some Jetlag I took Farrout for  a lovely winters day sail. By the time I got on the water the wind had died down a bit from it's midday peak but it was still strong enough to have us skipping across the harbor. First things first I needed to do was test some of the changes I'd made. Improvements to rigging setup:  Great! Fast setup of shrouds, quick attachment of rudder, boat breaker line just the right length. Took 20 minutes to rig and next time will be quicker as it's tuned already! New Zhik sea boots: Comfy, but not the extra grip I was hoping for. Going to have to extend the foot rests higher to get better purchase I think....

The Doctors In the House

Image
I'd heard that a stethoscope can be useful when vacuum bagging but finally got to use one. I had a leak in the most complicated piece I've bagged yet and was getting confused as to its location because the sound of air rushing through the back was distracting. Lucky my daughter has a scope - think it dates back to her being a sick baby but these days it lives in her dress up clothes. Using it got me down to the leak right away and with a full seal the piece came out great! And then all squished down Walk on the pier, with an audience later.... And the rudder box came out better than I'd expected for such a complicated piece. Still planning on a second  (well third) full layer of carbon I also took a moment to sand the inside of the dagger board case. This took down the main bumps and the daggerboard fit much better afterwards. I resealed and hopefully it still fits after that!

Rudder box

Image
With the gantry in place it was time to start building the lifting rudder head mechanism. Lifting firstly because I have kids and there is a beach in the harbor at low tides. Secondly because there are some lakes and bays I plan on sailing from where it will come in handy. This piece gave me some angst but with it 70% complete now I'm fairly confident it'll work well enough to get me sailing. My assumption is I'll be rebuilding some areas once we start sailing but really hoping to focus on the foils. As with most of Farrout I approached this with a mixture of 4mm mahogany ply, cedar and carbon / glass / epoxy. It all starts with a dry fit. Epoxied in some cedar Checking rudder fit Checking fit against the gantry Testing fit with both sides against the rudder. Some reinforcement on the rudder Bagging the rudder box Starting to get there. The tube on top was made by wrapping some carbon around the 1" carbon tube I...

Rudder gantry

Image
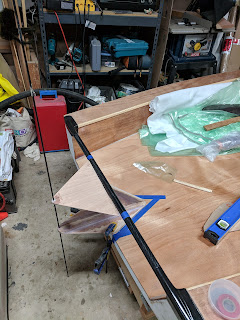
Been off the blog for a while but making slow progress on the boat. The rudder gantry took some elbow grease and I made a few mistakes but the final structure seems robust and I think it looks pretty stylish. Dry fit (the vertical line is a 3/16th inch rod used to test vertical alignment) Happy with that I got on with some vacuum bagging. Pretty happy with the end result, not perfect but I'm learning! Glued in place.... Once in place I tabbed the different parts together. Should be pretty bullet proof. Feels pretty comfortable to pick the boat up by any of the parts involved.

Foils mostly complete and working on the rudder gantry

Image
Not the biggest fan of my foils but they'll get me sailing. Need a little more finishing before they are done done but rudder and centreboard both at the 80% stage - hopefully really 80% and not the final 20% taking another 80%.... The rudder gantry is taking shape. I've epoxied a carbon tube across the transom and am building up a ply extension that will be carbon skinned to make a bullet proof and fairly light / elegant structure at the back of the boat.

Rudder gantry doodles

Image
I've been drawing out various options for the rudder gantry. Aims are easy to build, strong, light and aesthetically pleasing. Currently leaning towards carbon wrapped ply triangles top and bottom with minimal vertical structure between them. However I have some concerns about the lack of resistance to rotational forces. This is providing some inspiration (from here ). I'm wondering about modding it slightly by adding a carbon tube that the pin goes through so that when I drop the boat on its tail it's less likely to rip out of the transom. Not sure about rudder cassette or not. Very likely will end up with one due to the simplicity of build but very much TBD. Would be nice to be able to beach the boat easily too also.

Album