Posts

Showing posts with the label boat building

Next round of improvements

Image
Had another sail, this time with some wind. Still not on the wire though (I blame my weight, well, also the wind). Almost capsized a couple of times due to slips, or messing up with the long tiller extension. Came back with a few more projects. My hands were weak after three hours of sailing, and my legs bruised (find myself kneeling a lot in lighter air). [ Done ] Rework outhaul so it doesn't rub against the vang [ Done ] Raise the trapeze rings so I can crouch/wire in lighter air [ Done ] Improve travel on the vang, I two blocked it at one point [ Done ] Add ratcheting block to the mainsheet system Add non skid to a couple of sections Seriously consider foam pads in areas on the deck! In general though my first set of improvements (mainly the new smaller lines!) worked well. Some of this is already done. New lines to the left below, old to the right. MUCH cleaner now! The new sleeve on the boom worked well, though it may need some reinforcements ...

Splicing overview, and D-Splicer FTW

Image
I've been splicing lines for years now from a first rough double braided eye slice years ago ( this video was my tutorial, dude is awesome!). Mainly these days I find myself working with stripped lines for lightness and just accept that I need to resplice every so often. The difference is the splice used - a brummel lock splice - takes less than ten minutes to complete - in the video linked it takes three and a half minutes but then you need to whip them to stop the tail working loose. Splicing is something I often do watching TV in the evening. Anyway, I digress! For Farrout I've been doing three types of splice: The brummel lock splice for line segments in the vang, downhaul, outhaul and also the mainsheet end. Locked brummel loops (see this hammock video ) to attach blocks Continuous Control line splices like in this video , so that my lines don't have ends. Over the years I've moved from my original aluminum fids to this stainless set by R...

Beta testing

Image
Sail four coming up tomorrow but again looks likely a light air affair. Fingers crossed a little more puff than last weekend.... Did a few projects based on my first sailing. 1) Going to extend the rudder hinge to go through the tiller to speed up rig and de-rig. Because this will weaken it a bit in an already weak zone I'm first going to add a reinforcing sleeve. This project will go into the next week but at the end of it I'll be able to remove the rudder without taking the tiller off. I also decided to add a boom sleeve to stop the mainsheet snagging my neck. Couldn't see any off the shelf ones so ordered some sail material (both see through and dacron for edging) and double sided tape from SailRite. This made a pretty nice sleeve we'll see how long it lasts. Perhaps most importantly I reduced all the control lines from 1/4" to 5/32". These match the blocks and run a LOT better. Given that I also swapped back to low friction ring...

And.... BEEN SAILING!!!!

Image
There was one last piece to the puzzle, a license plate for the trailer. With the holiday season the DMV took an extra couple of days and next thing you know I was on a family trip to Atlanta. On my return I drove from the Airport to pick up the plates, attached them to the trailer and by mid afternoon was somehow magically sat becalmed and waiting for a puff.... Eventually it came and Farrout and I took a trip across the harbor. It was a bit of a mess to be honest, sail all out of shape and tacks a mess as I tried to find out how to get my body across the boat with the extension in the right place and that pesky mainsheet still attended to. That was Friday. On Saturday I went out again with a bit more breeze but still no trapeze and John Wilson in an FJ to run against. We skootled out past the seals on the outer buoy and generally worked up and down wind. By the end I was feeling more comfortable. Sunday, I took another sail. This was a quick sail post Christening ceremony (de...

Final bits 'n bobs

Image
Mounted the dolly on a RightOn trailer. Added a mast mount to keep it clear of my car Hoisted a sail for the first time And..... ready to sail...

Non skid decking

Image
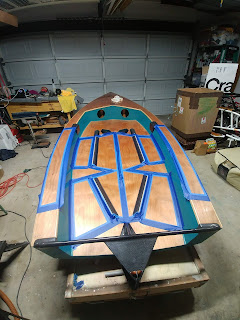
For non skid decking I added a final layer with some large crystal Kosher salt Came out quite nice. Originally I was thinking to keep the clear varnish finish but in hindsight seeing the non skid areas seems quite useful and I'll probably add a second pass with a color you can see at some point. To test line lengths I propped the boom up and started to look at how things would fit together.

Hull Paint

Image
Starting to put the hull paint down. Used an Epifanes Yacht Enamel and to be honest had a lot of difficulty. A fair amount of this was definitely user error but at the end of the day I feel the final finish is a bit soft. I over sanded the chines a few times. Plus a few spots here and there. Took another pass at the hull paint. Came out much better. The main thing was to work the blending in between sections better, I rolled slower and tipped smaller sections. Still not perfect though - if I get competitive with this boat we'll be back here again. In fairness the color is AMAZING!!!

Ummmm, ten months later....

Image
Seems like I've been lax at this blog. A couple of job changes and two growing kids have kept me busy but I did keep some time for boat building.... In fact I'm about ready to launch and the only thing that stopped me today was my trailer not being road legal. Next weekend though! I'll try and catch the blog up a bit, post a few highlights of the last few months. But.... Two years after I started I'm ready to go sailing....

Deck sealing in progress

Image
Plan is - three coats of 105+207 UV resistant epoxy, then paint the side walls (white I think) and varnish the decks and floor. Will use foam grip pads and avoid needing grippy paint finish. Just got two coats down. Lovely seeing the wood grain come out. Before doing this we (because the kids love it too) didn't do much sanding in the garage for a couple of days and I vacuumed and moped the floor to try and reduce the dust levels. Rolled and tipped the epoxy. Still not completely happy with the end result I get but once the varnish is on it will be fine. And the wood grain sure does pop!

Filling screw holes and sanding

Image
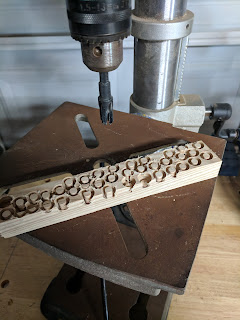
With the excitement of finishing the main hull construction behind me its been a boring week since as I prep the deck for sealing. Plan is to hit all of it with west system 207, then varnish upper decks, paint the side decks and I'm not sure what to do with the floor. Mainly because it's going to have a bunch of stuff on it. Perhaps 207, then stuff, then varnish. Why varnish? To improve the UV resistance. I've seen conflicting advice on 207 on the gunwhales. The main alternative is to oil them. This requires some up keep but seems less likely to crack. So I may leave the outers outside the Epoxy coating. Anyway back to the present. First task was to fill the little pinholes and slight depressions in the glue lines. That done I moved to filling the screw holes in the outer gunwhales.  I cut plugs out of a damaged section of the ash (am keeping the remnants for boats for my kids next). These are 1/4" Test hole filled. Holes plugged ...

Inner Gunwhales on

Image
Oddly I feel a bit sad as this marks the main bulk of woodwork complete! Plenty left, I'm projecting finishing in February. But still a bit sad with this milestone. The inners were easier to attach than the outers. No screws needed. A little tricky to get the top overlap sorted. Ash was used and the side decks got 1/4" thick strips, not much wood but it's solid. I used a wider (but slightly thinner) strips at the front and planed them to shape rather than bent them. Because of the requirement to fit at the side deck they ended up quite thin under the mast step but I think I'll live with this. Starting to look quite sharp. After playing with the idea of making the gunwhales wrap around the bowplate I just cut them short - easier and less chance of water getting trapped in clever geometry.  Overall I think she looks quite sharp. A lot depends on how consistent the final colors are. Got a couple of areas of minor damage I need a soluti...

Outer gunwhales on

Image
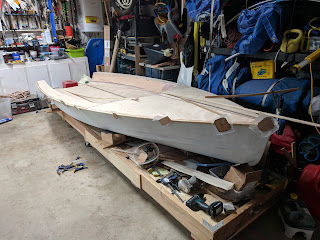
Took a bit of effort to glue. Clamped in the middle and worked out wards, lots of glue and a fair amount of squeeze out and cleanup. In one of the pictures you can see the custom clamping arrangement that allows you to adjust the edge overlap. The position of the ply governs the overlap. You want a little overlap to plane down and make the transition from the deck nice.

Ash Gunwhales

Image
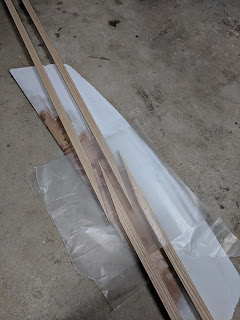
Decided on Ash for several reasons. Firstly it's commonly used for gunwhales, secondly its numbers (see previous post) are ballpark in the right area and thirdly my localish hardwood store had a nice plank that would fit in my car. I'm pretty aware that the woodworking side of this project is passing. In a few months this boat should be on the water, and I'll be building something different for my daughter but still it feels a little sad to be wrapping up this phase. And exciting. Fitting out Farrout for sailing will be fun! Anyway, one of the last woodworking tasks was to put in a couple of scarff joints on the gunwhales. Not sure if they will hold yet (this wood is stiff and hard to bend) but here they are: One more piece of ash to rip. And some gluing and screwing. Then time to cover the deck with some protection while I work on the other bits; rudder gantry, foils, hardware supports, foot rests, mast step, and then finally onto rigging. I'm going...

Album