Posts

Showing posts from August, 2018

Rudder gantry doodles

Image
I've been drawing out various options for the rudder gantry. Aims are easy to build, strong, light and aesthetically pleasing. Currently leaning towards carbon wrapped ply triangles top and bottom with minimal vertical structure between them. However I have some concerns about the lack of resistance to rotational forces. This is providing some inspiration (from here ). I'm wondering about modding it slightly by adding a carbon tube that the pin goes through so that when I drop the boat on its tail it's less likely to rip out of the transom. Not sure about rudder cassette or not. Very likely will end up with one due to the simplicity of build but very much TBD. Would be nice to be able to beach the boat easily too also.

Side decks on, and I messed up two weeks ago

Image
Put the side decks on today. It was reasonably straightforward. After a few hours I cleared the clamps, planed the excess off the tops and stood back to admire this next piece of progress. Wait. Was the front kinda lopsided? Sadly yes. And digging out an angle measurer I was soon confirming the bad news. The bottom of the port side bulkhead was offset 1/4" relative to the starboard. Arrrrggggghhhhh.... Left side is more upright than the right, just at the front. I spent some time wondering if I could live with it and decided no to. More measuring confirmed that it was fine at bulkhead 3. The problem was just that my custom bulkheads hadn't been as similar to each other as I thought. So I made a wedge to fill it. With some tiny spacers added in the corner to get the padding up to the needed amount. Funny thing is I still can't tell if this is straight. But that's a step forward from utter certainty that it was wrong. Good

Sealed the interior

Image
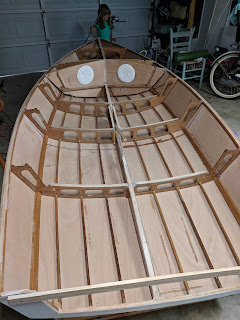
Horrible job. Three back breaking sessions. Not the prettiest result but should be water proof. Another coat would be pretty but I've added enough weight already and no one will see it so we're done!! Took a bit of time to fill gaps under the stringers, especially at the front. Initially tried using a plunger applicator then switched to using my fingers to make the fillets, just too many awkward angles in the bow. I have a theory that I over faired them (Dave did the same too I think) because I used a batten across one direction of curve. The compound curve however has tension in two directions.

Getting ready for the decks

Image
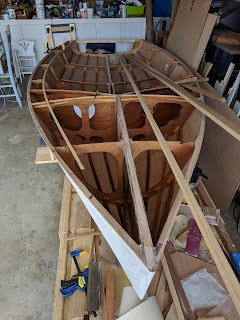
Carlins installed Drain holes, 3/4" seem a bit big but will seem smaller when the deck and hardware is all added. Forward bulkheads (not in plan) just fitted in one of my scarf joint fails. Bevelling the deck support on the forward hatch. Using a batten to position/shape/bevel the support for the deck. Forward bulkheads in place And with deck / side deck supports, access holes and the side decks all ready to seal. I should mention at this point that I'd advise sealing the hull sheets prior to attachment. Looks like it'll take me six back breaking hours to get all this sealed :(

Hardware thoughts

Image
I'm building up the forward bulkheads (basically a variation on the pattern set by Dave - here ). This got me thinking about hardware as some of it needs to go in before the boat is sealed up (Namely the chainplates, I guess you drop in a small access plate if needed. Looking at Dave's build the chainplates just appear majically in March 2013, I don't see him having them on before at all. The plans call for them being bolted on prior to the upper deck. I tried 4" access ports but found it hard to reach around with my arm inside, so went with WestMarine 6" ports. Later on I saw you can get 5" ports, these might be ideal. I can see the weight coming on.... Now I've cut the holes for two bulkhead access panels it strikes me one would be lighter... oh well. Forestay For the forestay attachment a SS EyeBolt seems easy to add, neat and pretty robust. Perhaps something like this - well a bit smaller as nearly 9000lbs breaking strength is a slight

Flipped it over!

Image
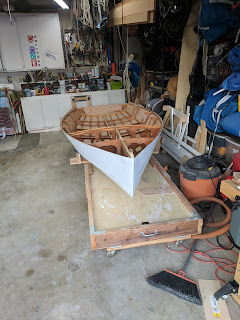
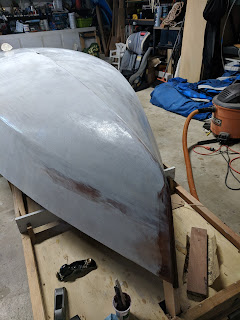
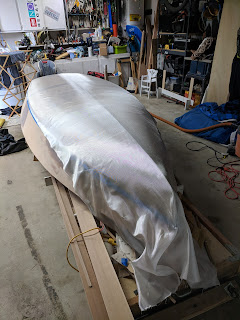
Sanding sanding and more sanding until finally the hull was approaching a paintable surface at which point unscrew and flip it over...... Amazing to finally pick it up and have a look. A sense of accomplishment. And then immediately started seeing the runs that need removing, the gaps that need filling, the edges that need trimming. But the accomplishment remains. I'll call this halfway and we'll see how it works out. I'm looking forward to be getting back to woodwork all the epoxy coating and sanding was getting old!

Back on track, almost ready to turn the boat over........

Image
.... just wondering how much pre paint prep I should do now, for instance fully sand the bottom while it's firmly attached to the base? Anyway, finished scrapping the muck off from my c**k up and sanded and got back to reapplying. Took a moment to shape the stem and glue it on. I did this after the glass as I see it as a sacrificial element and want it to be easy to grind off. Having said that it's made of a pretty solid piece of teak. Rolling and tipping makes a moderately smooth epoxy finish but it's not perfect. Going to require a fair amount of sanding to be ready to paint.

Waste three days

Image
I was rushing..... I've been sealing the bottom. A layer of 4oz cloth laid over the hull for two days, then squeegeed, then filler coats with pigment in them to make it visible where I'd rolled them on. It was going swimmingly or so I thought. I had a race to get to on my big boat, and winches to rebuild before we hit the water so as I say I was rushing as I laid down the final filler coat. And on the last batch (I've been working in 4 pump squeeze batches, seems a nice working size) I suddenly realized the viscosity felt different, lighter.  And the pot wasn't warning.... Ooops. No hardener. And I had to rush off leaving it like that. In hindsight this was silly, I should have scrapped off as much as possible but I figured if it didn't set it would still be easy to remove later. WRONG. Some of it actually went quite hard, but I could still mark it with my nail 24 hours later. So I scrapped it off. Two hours of scrapping. Probably some more tom

Album