Mounting The Frames
The frames get mounted onto the build box (also known as a strong box) temporarily screwed onto a set of mdf (or other dimensionally stable material) forms.
I'd never used power tools on mdf before. What a mess. It just dissolves into a fine dust. Worth taking some precautions.
My expectation is to spend most of this week going through this process. At the end of it the boat will be in its final shape for the first time just in skeleton form and the long process of filling in the gaps will begin. Getting the frames setup exactly to measurement is critical, and I'll admit to being a bit scared, though worst case when double triple quadruple checking I'll find the mistake and just have to unscrew things and do it again.
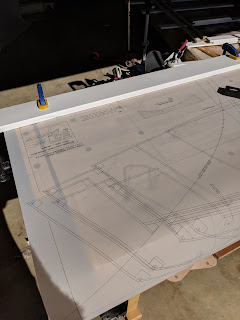
The plans come with a plastic template that shows offsets from the baseline that the build box provides. I set this up with a straight edge along the baseline to work from.
While initially a bit scary once I got into the flow it became less intimidating. The plans and solid baseline make things pretty easy to get accurate (hopefully).
The transom was the first frame finished.
After that I did Frame#2 because it seemed easier than the frames split across the girder. They can wait until tomorrow. To help get them right I'm going to make up a little divider the same width as the girder and clamp it in place like the baseline straight edge.
Blimey I'm up to date.
I'd never used power tools on mdf before. What a mess. It just dissolves into a fine dust. Worth taking some precautions.
My expectation is to spend most of this week going through this process. At the end of it the boat will be in its final shape for the first time just in skeleton form and the long process of filling in the gaps will begin. Getting the frames setup exactly to measurement is critical, and I'll admit to being a bit scared, though worst case when double triple quadruple checking I'll find the mistake and just have to unscrew things and do it again.
The plans come with a plastic template that shows offsets from the baseline that the build box provides. I set this up with a straight edge along the baseline to work from.
Prior to this step I'd worked out the approximate lengths of all the mdf needed. Most of it is about 3 3/4" with the thinner pieces half that. Only the base board seems to have to be exactly true, but I'd imagine that the more exact the rest the easier setup will be.
The transom was the first frame finished.
After that I did Frame#2 because it seemed easier than the frames split across the girder. They can wait until tomorrow. To help get them right I'm going to make up a little divider the same width as the girder and clamp it in place like the baseline straight edge.
Blimey I'm up to date.


Comments
Post a Comment