Posts

Daggerboard part iii

Image
I'm hoping to finish this on part iv and do so this coming week but we'll see. The leading edge looked good but the rope fluffed up on sanding. The fluff sat down with a little epoxy but still not quite convinced by the penetration into the dyneema. Feels tough though so i'm going to go ahead and skin over it and  we'll see in the long term. And epoxy and clamp it down again.

More Daggerboard

Image
Dang I see it's nearly a month since my last post! Combination of work and slow progress on the daggerboard. Getting somewhere though. Just added a leading edge dyneema rope for some reinforcement. Final shaping to come and finally the carbon skin, for which I have a vacuum pump, the bagging materials and the valve but not the tubing to connect it all together. Really I've sort of been stalling. Router Jig. I used the router to cut along contour lines. Routed out lines. Planing down to the lines One side roughly shaped Using templates to check shape during sanding Some filler also. And more sanding. Pencil lines are where a rope leading edge will go and where the trailing edge will be cut short. All the different templates I used. Vacuum bagging materials and the leading edge rope. Bevelled  Tool used to do the bevelling - screw with edge filed sharp in a cutout of the leading edge. Rope soaking. Dollops ...

Started on foils

Image
Rough beginning perhaps? My plan is to shape some cedar and sheath it in carbon. Clamped hard and gluing. How it started - a bunch of 2" strips 1375mm long. Full length of the foil will be 1370 but I added a small amount to trim.

Started on hardware

Image
Drill the holes for these guys. My kiwi bow fitting is now attached. Well it was, it got removed shortly. 

Deck sealing complete

Image
After three coats I felt okay about the deck but not the floor. Some parts of the floor were good and others pretty dry. So I sanded it (an the sides) down and re-coated it. Took a moment here to consult with my boss. Then concluded that the floor looked pretty good and now the decks needed some work so I sanded them down and applied another layer.... Much better! This was the roller I used in the end, expensive but produced a much better result than the standard foam rollers.

Deck sealing in progress

Image
Plan is - three coats of 105+207 UV resistant epoxy, then paint the side walls (white I think) and varnish the decks and floor. Will use foam grip pads and avoid needing grippy paint finish. Just got two coats down. Lovely seeing the wood grain come out. Before doing this we (because the kids love it too) didn't do much sanding in the garage for a couple of days and I vacuumed and moped the floor to try and reduce the dust levels. Rolled and tipped the epoxy. Still not completely happy with the end result I get but once the varnish is on it will be fine. And the wood grain sure does pop!

Filling screw holes and sanding

Image
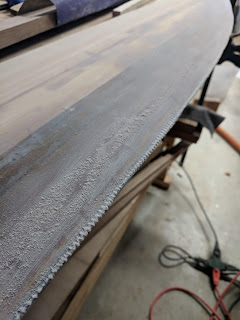
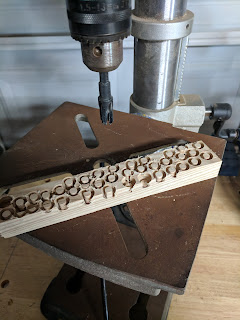
With the excitement of finishing the main hull construction behind me its been a boring week since as I prep the deck for sealing. Plan is to hit all of it with west system 207, then varnish upper decks, paint the side decks and I'm not sure what to do with the floor. Mainly because it's going to have a bunch of stuff on it. Perhaps 207, then stuff, then varnish. Why varnish? To improve the UV resistance. I've seen conflicting advice on 207 on the gunwhales. The main alternative is to oil them. This requires some up keep but seems less likely to crack. So I may leave the outers outside the Epoxy coating. Anyway back to the present. First task was to fill the little pinholes and slight depressions in the glue lines. That done I moved to filling the screw holes in the outer gunwhales.  I cut plugs out of a damaged section of the ash (am keeping the remnants for boats for my kids next). These are 1/4" Test hole filled. Holes plugged ...

Album